A-Wing WIP 2: Belt, Harness & Bits
Leave a commentJanuary 21, 2014 by catomighty
Acquisitions and construction continues on the A-WIng pilot costume.
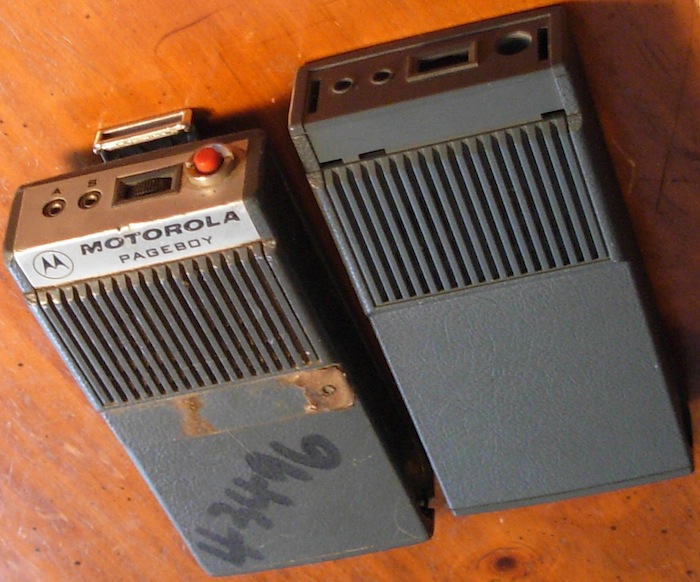
Latest acquisition is a Motorola Pageboy, plus an extra front casing for it. Good thing I got the extra casing, since the one on the full unit is cracked and chipped. A-Wing pilots, among others in Return of the Jedi, have a small black box hanging on their belt. Available images are blurry and indeterminate, but they appear to be something of a pager nature and very Pageboy-like. The Pageboy is the correct approximate size of 5″ x 2.5″. Some variations in the blurs between different photos may also indicate that the props department used a number of different models of pagers as the starting basis for their conversions. It’s not guaranteed that the Pageboy was one of them, but there are enough hints to my satisfaction that this is a likely contender.
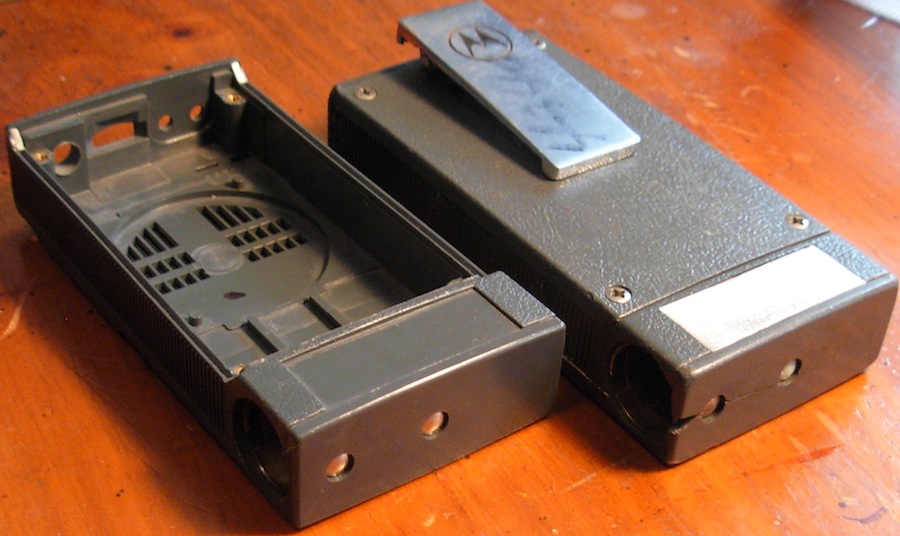
Low-angle photos on the prop ones show two shiny dots where the rivet/recharging-points are on pagers. Very likely the props department modified whichever models they actually used, so that they would not be identifiable on-screen as the original. For the Pageboy to work, they casing unit will be flipped around backwards with the speaker grille hidden against the body. The original spring clip to hold it on a belt must be removed. The movie props also have smaller black boxes attached in the upper half of the front, and this box would cover over any markings left from the removal of the plastic tabs that hold the spring clip.
The photo below from a costume exhibit shows the black box more clearly than it appears in any of the actual screencaps. Secondary photos like this typically have a number of discrepencies and may include pre-production items that were changed before filiming, and/or bits from other pilots. But sometimes its the clearest evidence available
This, and other secondary photos clearly shows a pair of triangular safety stitching on the front of the belt. The buckle would be on the back in this exhibit. However, none of the screencaps of A-Wing pilots give a hint of these. The armswing pilot in the movie does not have a buckle in back, nor a visible hint of these triangles in the back where they would be if this belt were turned around, so I have not added them onto my belt.

Actual construction work also continues. The slider buckles have been attached to the 2″ webbing for the ejection harness. I won’t completely finish these until the flak vest is done. Once the vest is ready, I’ll trim off excess webbing to a length that fits nicely with attachment points on the inner side of the vest.

And the waist belt is finished, with flare-loops added and weathering done. There are no photos that show both sides of the belt on the same pilot, we only get to see one side or the other. Deducing from the evidence available, I think the most likely probability is that the A-Wing belt has 2 sets of flare loops, one on the front right corner and one on the rear left corner.
Secondary photographs from outside of the movies clearly show loops on the right front, but with no view of the left rear to confirm if there are loops in back or not. Actual screen shots from RotJ show hints of loops on the front right of some pilots, and on the rear left of others. The armswing pilot who has the most foreground screen time definitely has rear left loops. Some onscreen A-Wing pilots also seem to have their belt buckle in front, and others in back. If they merely flipped the belt around on different pilots, that would change the position of a single set of flare loops. If there are 2 sets of loops, they would both appear in the front right and front left, regardless of whether the belt is buckled in front or back. Armswing pilot has left rear loops and no buckle in back. The two pilots who walk straight towards the camera appear to have front buckles and right front loops. No pilot onscreen shows not-having loops in one of these two positions. This evidence supports the probability of both sets of loops on the belt. (See the screencap collections in this post.)
Making my belt, I sewed the buckle on first, then positioned the end of the right front loops about 6″ away from the center of the buckle.
I sewed the loops to fit the 1/4″ aluminum flares very very snugly. They will not fall out! I did a test loop first fitting the loop around a 3/16″ rod. That was too snug, the 1/4″ flares couldn’t be forced into that. So I spaced the actual loops just a little bit bigger than that, and super snugness was achieved.
I marked out the sewing lines on the webbing with a pencil. The graphite lines on the front surface of the looping just add to the final weathering. On the back of the belt, I marked out the sewing lines with equal spacing for the loops and the space inbetween them. This is marked every 3 bands on the fabric of the webbing.
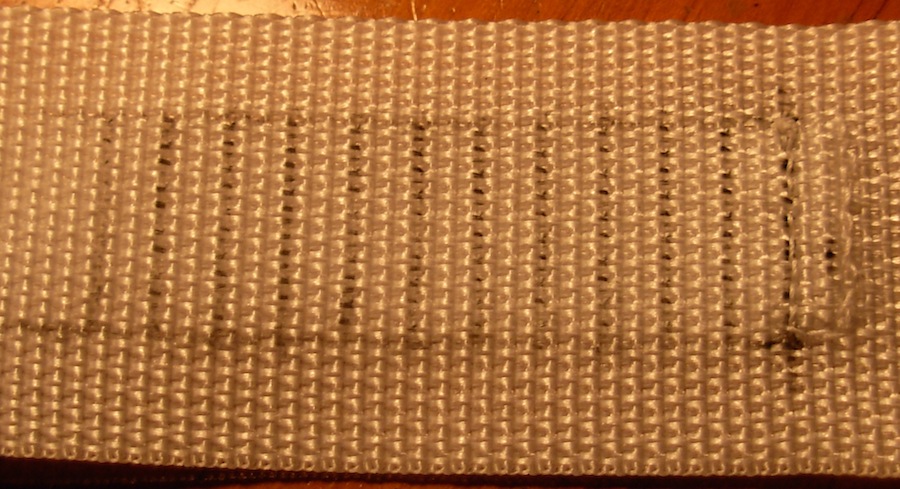
On the front of the loop piece, the spacing is marked every 5 bands for the loops, and 3 for the spacing inbetween.
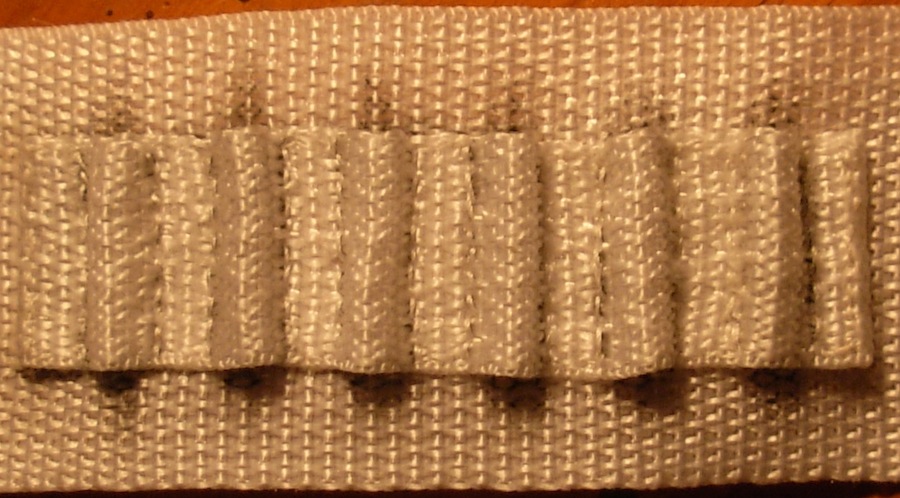
![]()
The photo above shows some extra material on the left end of the loops webbing. This end was rolled under and sewed down. As sewing progressed, each line on the front was carefully aligned with the corrsponding one on the back as I passed the needle through the two layers. After all the loops were sewn I trimmed off the remaining end, heat-sealed the nylon by passing it lightly over a candle, then rolled it under and sewed it. Then after all the sewing was done, used the pencil again to rub the edge of the inside of each loop, and also on the belt itself just inside and outside each loop to show weathering marks from lots of use.

Before doing the next steps, I put the belt on over a heavy sweatshirt to approximate the fit over a flightsuit. At this point, the metal slider adjuster was fitted in position to adjust the fit, but not sewn in yet. With the buckle centered in front, I marked the center rear of the belt. From that center mark, positioned the second set of loops 6″ away from that. Whether the belt is buckled in front or back, the loops will be in the same position on both sides.
After sewing on the second set of loops, I then put the belt back on and adjusted the final placement of the metal slider, trimmed off excess belt material, heat-sealed the end, and sewed it into place. I placed the slider about 2/3’s of the distance away from the buckle towards the left rear loops. There is no photographic or screencap evidence that can confirm whether the belt actually has a slide adjuster or not. However, it is eminently practical to have one. The spot where I located mine is not clearly visible in any of the screencaps or secondary photographs, and so there is no contra-indication for its use there. This placement also leaves suitable room to adjust the fit of the belt.
And lastly, added the final weathering step by passing some portions of the belt lightly over a candle to add the soot streaks. Weathering is one of my favorite parts of any model making ^,^


*****
Edit 13 February 2014. Been haunting the local thrift stores to find a wool coat or skirt for material to make the vest. Just got this $15 Jones New York coat, and the colour is nicely speckled similar to whatever industrial felt they used in the original costumes. Best of all, the colour appears either brown or grey depending entirely on the light!

