1st BBQ-DBA, Punic Wars
2December 14, 2014 by catomighty
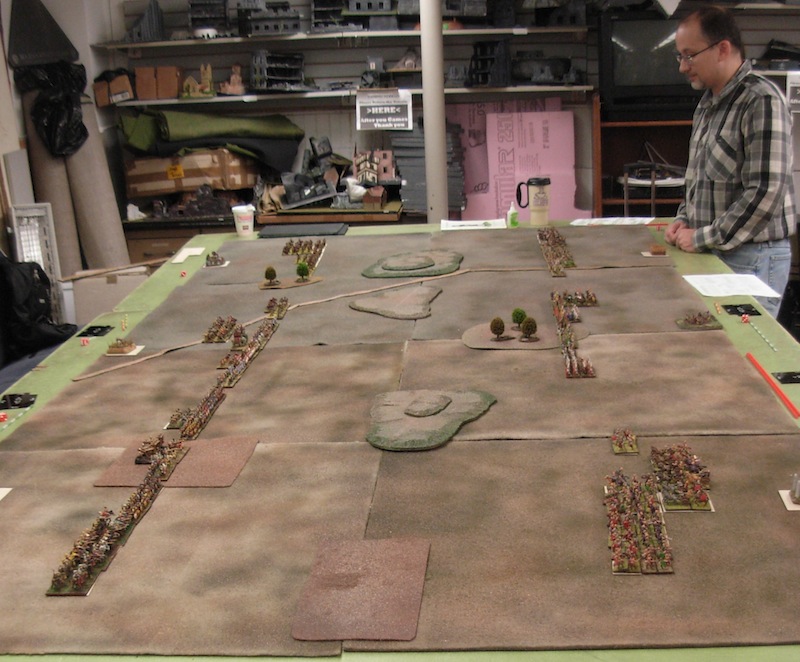
Back in September, we played a Punic Wars battle for the monthly DBA day with the Boston Trained Bands club at the Hobby Bunker, our FLGS, using the DBA 2.2+ amendments. BBDBA = Big Battle DBA, typically 3 armies per side. Quad DBA = using the stands from 4 regular armies to represent a single army; place 4 regular stands (3 in a pinch) on a sabot base to represent each element; double the table size and all movements and ranges. BBQ-DBA = Big Battle Quad armies!
Super-epic looking battle, although at the price of longer set-up time. We played one game in the time that we would normally play two. So we won’t always play this set-up format — but definitely will from time to time for a visual treat. Also hope to run a game in this at a convention some time.
For the sabots, I ordered double-sized thin bases from Litko. Suspected these would likely need some thin sheet steel added to them so that the magnets on the bottoms of my regular bases would stick for more convenient handling. Experience did indeed show that adding the thin steel will be handy, and I’ll add that to the sabots before we play this again.
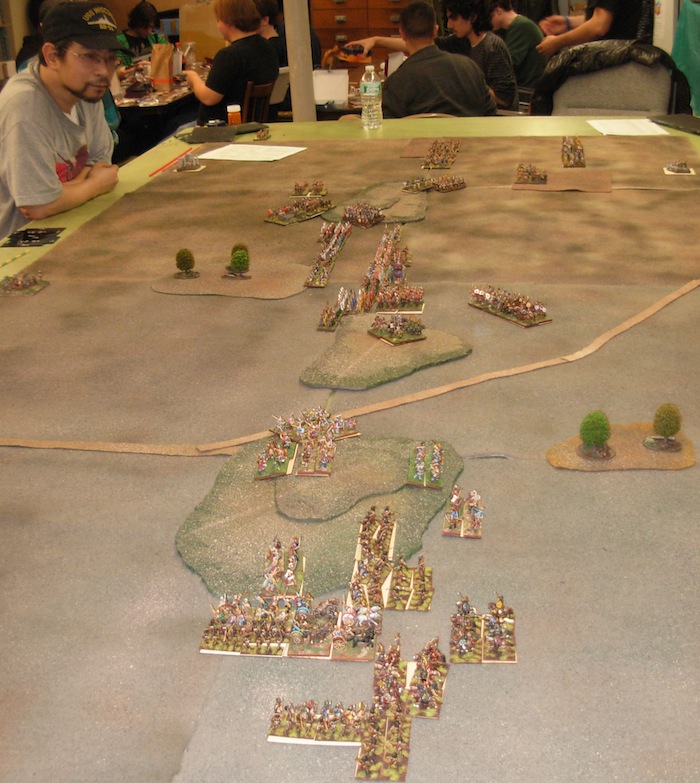
For this battle we had a a Roman army, plus two separate Gallic allies on one side. Sadly, the photos aren’t as crisp as I’ld like — did not have the best camera setting for the lighting in the game room, grr. But, should be clear enough to tell the tale and convey some of the grandeur….
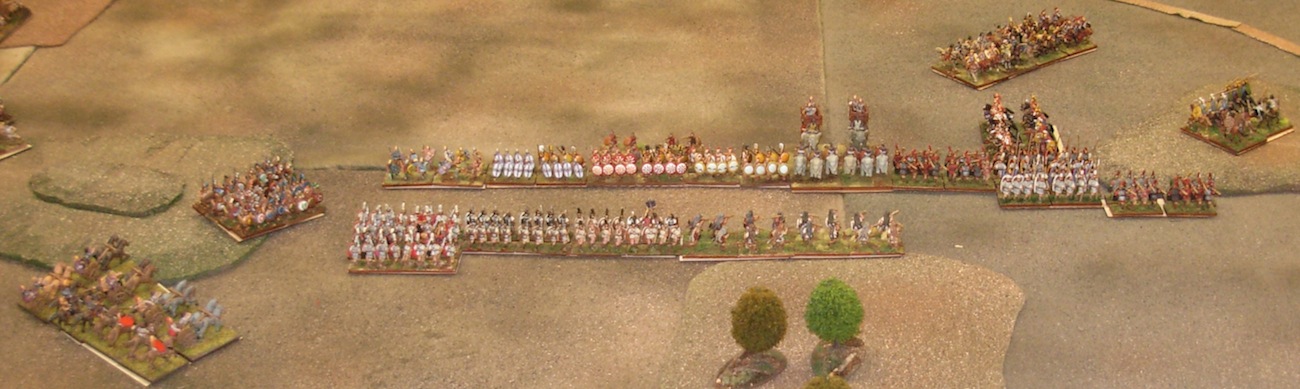
Roman center deployment:
![]()
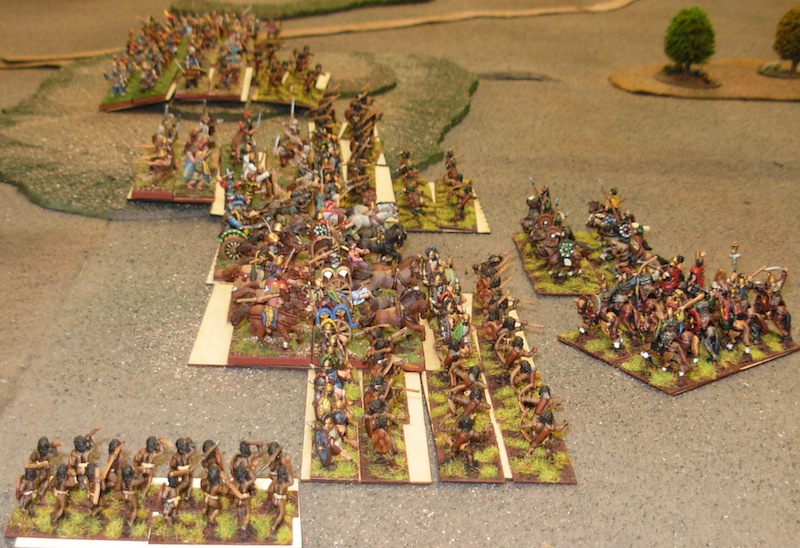
Gallic ally right flank deployment:

Gallic ally left flank deployment:

The full Roman/Gallic starting position:

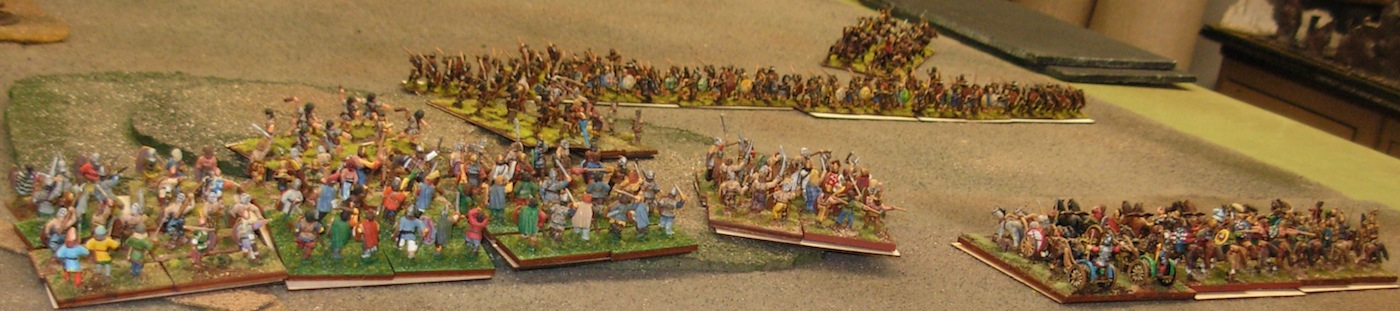
They battled against a Carthaginian army with an Iberian Spanish and a Syracusan ally (not quite an historical combination on a single battlefield, we were working with what we had on hand to make the quad armies).
Carthaginian center deployment:

Spanish ally left flank:
![]()
Syracusan ally right flank:
![]()
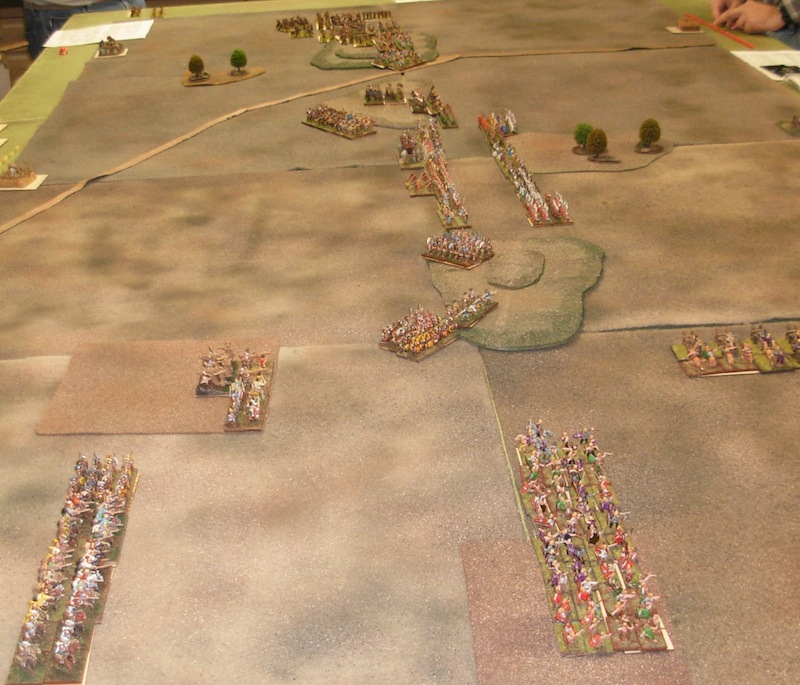
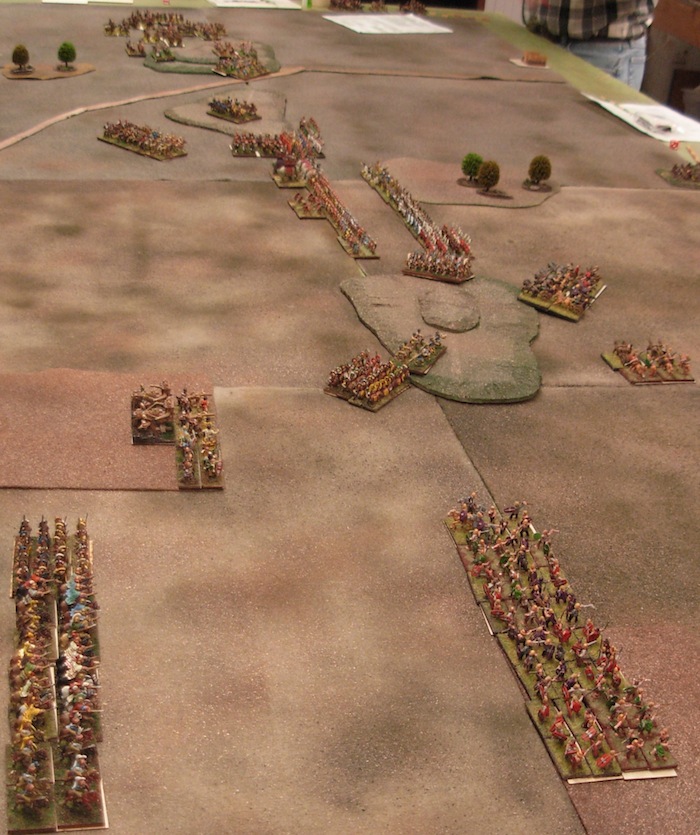
The full Carthaginian and allies battle line:

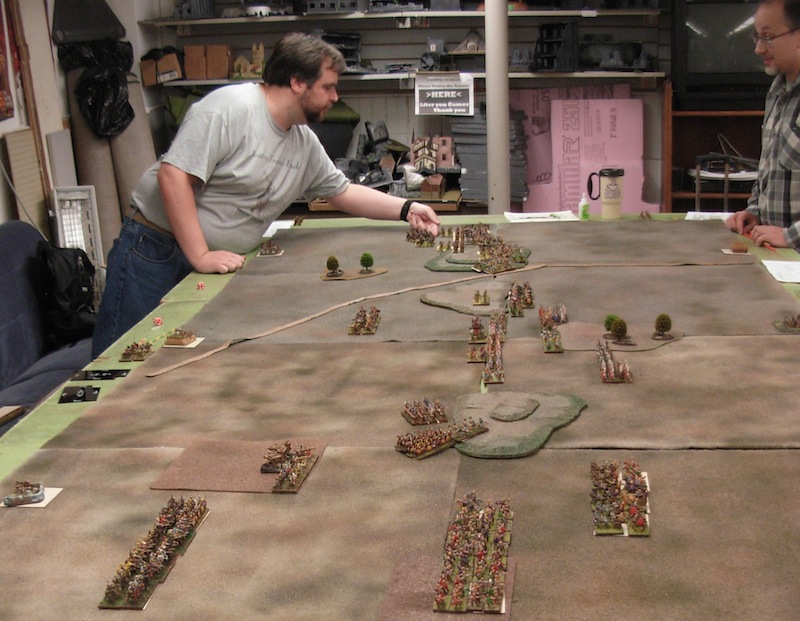
And the camera pans back to show both facing armies:
On the first turn, the Gallic right flank allies surge forward. The Romans and left flank allies, who both rolled low command pips, merely send their psiloi rushing ahead to secure screening positions. Carthaginian command remains behind while the main body of their army presses ahead. Spanish swarm forward to match the eagerness of their opposing Gauls. Syracuse advances some troops through the rough-going of the ploughed fields.

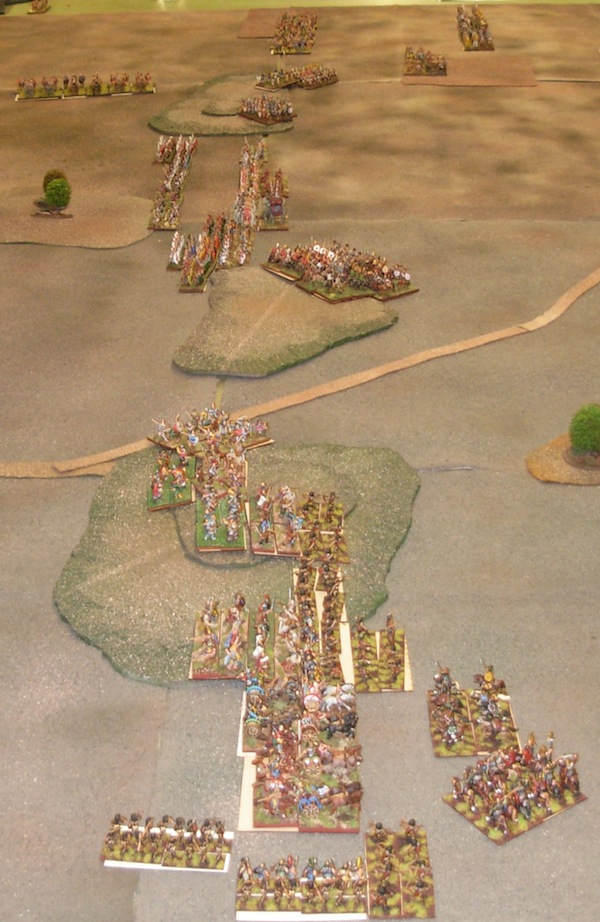
Turn two, general advancing behaviour continues:

Turn three, the armies move ever closer to actual battle. The likelihood of how the battle may progress can be discerned from the relative positions of all the combatants here. Big Battle DBA rewards aggression. The game is most often won with the destruction of the C-in-C command on one side. Aggressive attack and rapid destruction of the enemy’s C-in-C army is the quickest route to victory.
While the Carthaginian army is pressing fast to come to grips with the Roman army (the two opposing C-in-C’s), the tactical advantage weighs heavy with Rome at this moment.
Carthage still has its 2 cavalry elements (including the General) back on the start line. While the General is safe from being killed, he is also perilously far from being able to provide any combat support to the front line.
In the foreground, half the Syracusan army has also not advanced yet. While the opposing Gallic chariotry is held slightly back, they are in a position to swing in either direction around the steep hill.
On the far flank, the Gauls have all advanced. Spanish Psiloi have pushed right into the first contact of the battle on the steep hill. But not all of the Spanish have pushed forward as aggressively. This is perilously exposing the Carthaginian Psiloi and Light Horse on the center gentle hill to threats from their front and flank.

Iberians and Gauls meet! On the right can be seen the Gallic Chariotry — the General is distinguished by having 4 stands of chariots on the sabot, the other 2 regular Chariots have 2 stands of chariots in the front rank of their sabots, and 2 stands of cavalry in the rear rank.
Top of the 4th, the right have of the Roman line engages! Gauls hit the Spaniards full on. Roman infantry and cavalry steadfastly march up the hill against the Carthaginian light troops.

Gallic Warbands storm the hill:

As the Chariots charge round the side with their Chieftain and General engaging directly:

Likewise the Roman General engages directly on the center hill. The General’s sabot is distinguished by 4 stands of cavalry in red cloaks. The regular stand has 2 cavalry in the front rank and 2 stands of light horse in the rear:

Bottom of the 4th, Iberia hits back hard, while the Carthaginian General and escort begin the long trot forward to try to salvage the remnants of their position on the center hill. The main Carthage battle line hesitates to advance and expose its flank to even greater threat from the Roman General. They hold tight and await reinforcements.
Tribal rivals battle fiercely, and the Spanish General’s Cavalry is imperilling his own infantry by blocking their ability to recoil:
Top of the 5th, the Roman right half continues to press hard, and over on the left, Gallic Chariotry redeploys to support the Romans, realising their own army is under little threat from the Syracusans.

And Roman Cavalry moves to crush the remnant’s of the Carthaginian pickets:

Bottom of the 5th, Carthaginian Cavalry arrives to find a Roman controlled hill, the cries of a swirling battle beyond on one flank, and a strange silence from the other. But some Syracusan infantry are marching over the hill to shore up the Carthaginian battle line.
Top of the 6th, Gaul and Spain battle on, Roman General engages Carthaginian General, Roman Infantry begin to engage near flank of Carthaginian line, Gallic Chariotry on the far flank sweep in to counter the Syracusan reinforcements.
The Carthaginian view does not look promising. Rome is rolling their flank with determination. In the center can be seen Cartho’s elephants — 2 stands of small African Forest Elphants on the front of the sabot, backed by 2 large Indian elephants.

As the battle swirls, the Iberians have taken some casualties, but strengthened their lines and hit back killing Gauls in return, the outcome on the flank is uncertain:

While Roman Cavalry have not fought well on the hill, their infantry are inflicting casualties in the line. Advantage is still Rome’s:

By the end of the 7th turn, the Romans are rolling the Carthaginian flank hard, and the Roman General faces his nemesis who has withdrawn to regroup with a cavalry line away from the Roman’s uphill advantage:

Then during the 8th, rather than facing off against the Carthaginian horse, the Roman General makes a bold move to personally sweep into the flank of the Carthaginian line in a vicotorious surprise gambit; and on the other end of the Carthaginian line, Gallic Chariotry have arrived to pin down the Syracusan reinforcements and prevent them from rolling the Roman line. The command of the Carthaginian Commander in Chief is broken:
Meanwhile, over in the tribal scrum on the hill, did the Iberians finally break the Gaul’s command? DId they remain locked in a bloody tie? With the Carthaginian C-in-C’s command broken, and their whole army having taken more casualties than the Roman side, that final result was no longer important, Gaul held both flanks until the field was won by Rome and her allies!
The Syracusan flank is still quite, and their army withdraws in good order. In the three-way struggle for control of Sicily, they need not fear an attack from Carthage anytime soon, and may well be able to negotiate a peace with Rome for the time being:

Great post, Maureen! Happy to see the BBQ game photos. Will you post about the 12/14 game?
Maybe, that was just an ordinary Big Battle game. If anything really jumps out in the photos, I’ll do a post.