BloodBowl Pitches (useful for Dungeon Tiles too)
Leave a commentMarch 1, 2013 by catomighty
One of the many delights of BloodBowl 2nd Edition was the detailed styrofoam ‘astrogranite’ pitch. However, Games Workshop made a very typical mistake for designers of boardgames with miniature figures — they made the squares on the pitch the same size as the bases of the minis. This does not allow sufficient room to place a crowd of minis in excited poses all in adjacent squares! (Designers still make this basic mistake today, such as Soda Pop Miniatures did with the dungeon tiles for Super Dungeon Explore, grr.)
WIth the 3rd Edition, of BloodBowl, GW went to a printed game board and larger squares. But sadly for indecipherable reasons, they went with new grass pithes instead of the iconographic astrogranite. They also didn’t retool the production of the throwing templates; so with the new larger squares, the passing ranges all got shortened.
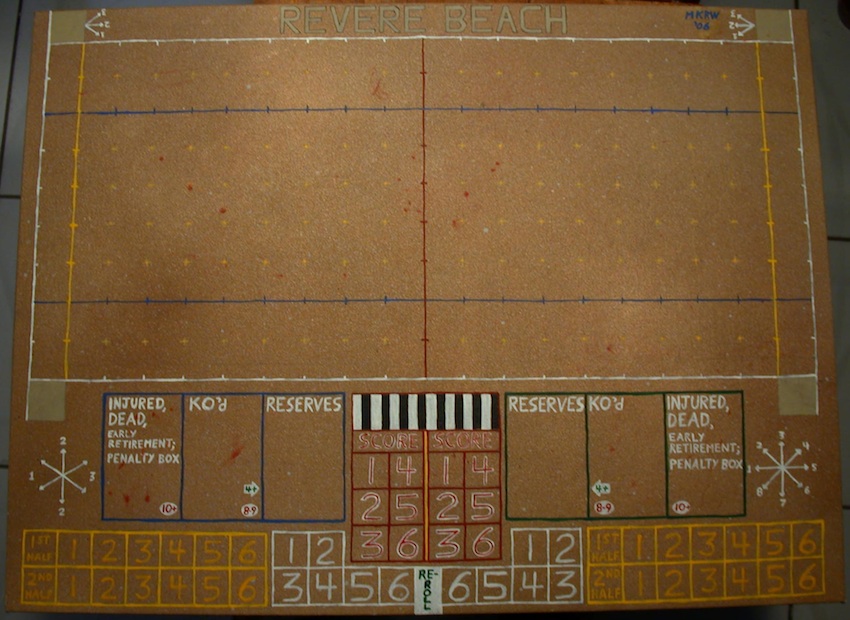
I really prefer the size of the larger squares, and so painted my own pitches cause my teams play on astrogranite! Except for the forays into BeachBowl and StreetBowl….
HOW TO PAINT ASTROGRANITE PITCHES
(Also a good technique for Dungeon Tiles)
* Use Artist’s Canvas Panels, get them at the big craft stores with the weekly 40%-50% off coupons. They provide superb texture and come in handy sizes.
* Spray paint an overall base coat and the edges. Use an enamel paint for the base, acrylic will cause more warping.
* The boards are relatively warp-resistant, but best stored flat. If they do warp, they straighten out pretty quickly if you lie them flat and stack a bunch of books, hammers, cats, etc. on top of them overnight. When I completely cover them with spray paint, they warp a bit when drying. But as soon as they are dry, I flatten them out again before going to the next stage
* When that dries, spray paint with several colours of green, brown, and/or tan to get a speckled ground cover.
* When that dries, use a pencil to draw in the gridline, dugouts, score tracks, etc.
* Brush paint the major lines of the edge of the pitch, goal lines, wide lines and line of scrimmage, the dugouts, score tracks, etc. Paint a dot at each corner of the squares on the pitch while its still easy to see the pencil grid.
* Take a roll of masking tape, and use an Xacto knife to score around it, cutting narrow and slightly wavy strips. Use these strips to mask off all of the gridlines between the squares on the pitch, including the painted lines and all the dots marking the corners. Use extra little bits of the strips to mask of cracks within the squares. With masking tape and newspaper, mask off everything outside of the pitch. When you are done, only the squares of the pitch should be showing.
* Spray paint with several colours of gray, black, and highlight colours of tan, or light purple, or aqua, or red to make speckled stone squares.
* When this is dry, remove all the masking and brush paint to touch up the edges of the squares to make the stones a little more irregular. And add some red blood splots.
* When dry, seal with a light spray of Dullcoat, or other sealant of choice.
Close up of surface texture detail:

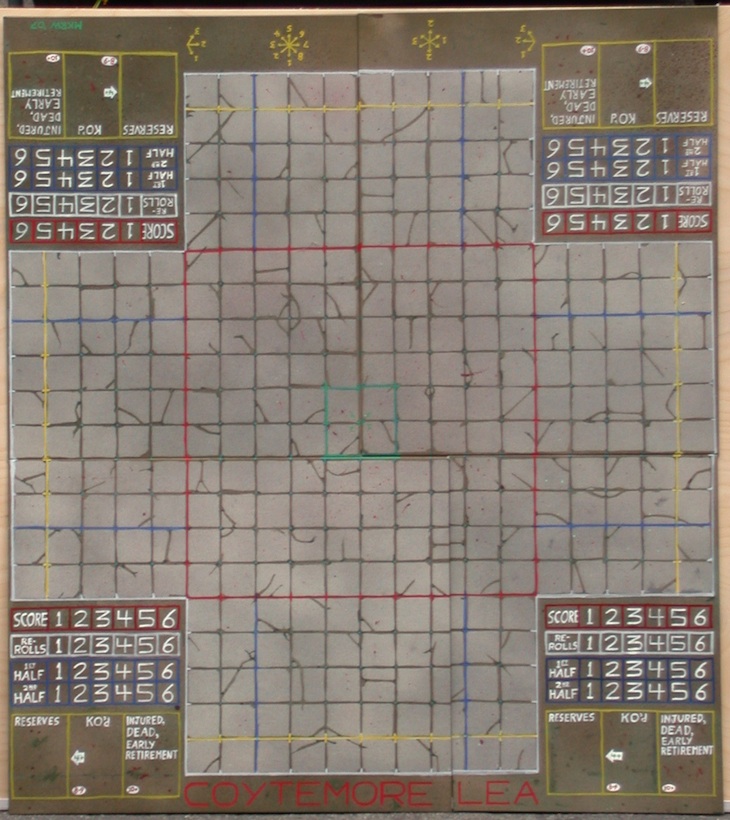
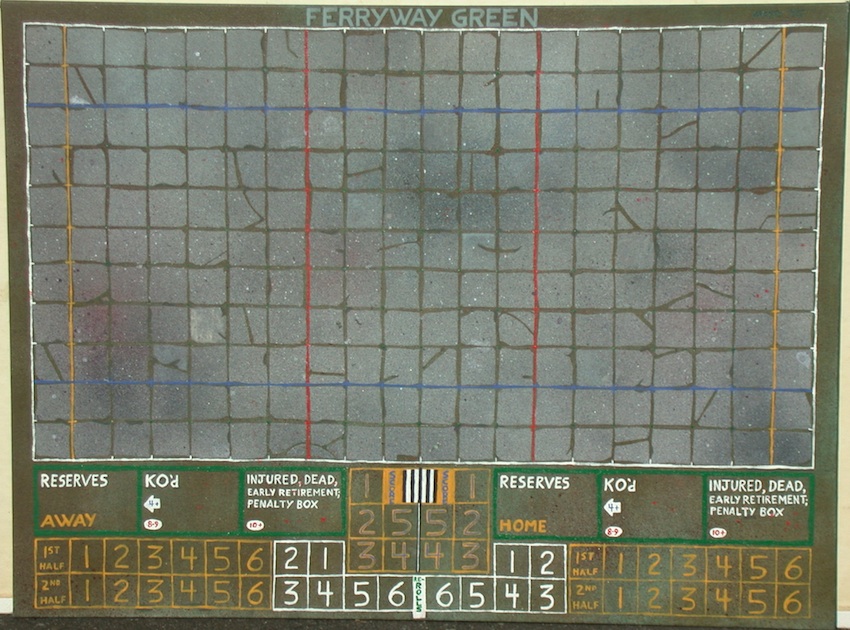
Regulation sized pitch on (2) 18″ x 24″ panels:
BeachBowl Pitch and (2) BBSevens Pitches, each on (1) 18″ x 24″ panel:

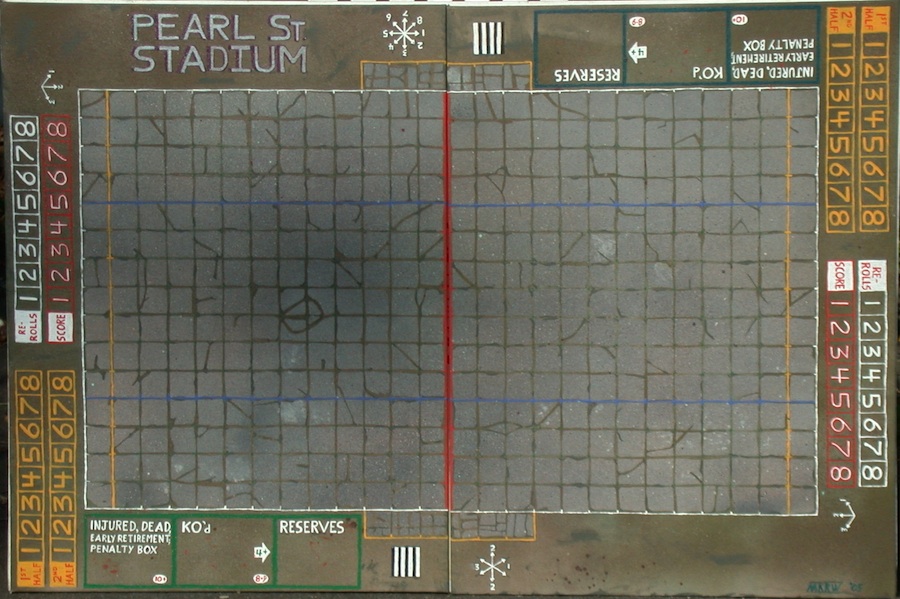
StreetBowl Pitch on (2) 12″ x 16″ panels:

Pitches sized to accomodate Ogre Teams work best with 40mm squares, and require painting scaled-up passing templates on clear acetate to go with them.
An Ogre-sized Regulation Pitch with 40mm squares on (3) 18″ x 24″ panels:

An Ogre-sized StreetBowl Pitch with 40mm squares on (2) 18″ x 24″ panels:

An Ogre-sized DeathBowl Pitch with 40mm squares on (5) 18″ x 24″ panels:

An Ogre-sized Sevens DeathBowl Pitch with 40mm squares on (3) 16″ x 20″ + (1) 12” x 16” panels: